Are you looking to add a touch of convenience and style to your vehicle? Wiring a push button start straight from the starter can be the perfect solution. With this simple modification, you can enjoy the ease of a push button ignition system. In this article, we will provide you with a step-by-step guide on how to wire a push button start, straight from the starter.
Whether you’re a car enthusiast or a DIY enthusiast, our comprehensive wiring guide will walk you through the process from start to finish. Armed with the right tools and information, you’ll be able to complete the installation with ease.
From gathering the necessary materials to accessing the ignition harness and connecting the hardware, we’ll cover all the essential steps you need to take. We’ll also provide you with important safety considerations to ensure a smooth and secure installation process.
By the end of this guide, you’ll have the knowledge and confidence to install a push button start system in your vehicle. So let’s get started on transforming your driving experience!
Key Takeaways
- Wiring a push button start straight from the starter adds convenience and style to your vehicle.
- Gather the necessary materials, including a relay, momentary switch, and various tools, before starting the installation.
- Access the ignition harness and identify the ignition and starter wires using a wiring diagram specific to your vehicle.
- Connect the hardware by soldering the ignition and starter wire ends to the appropriate switches and relays.
- Install the system by placing the buttons and switches in desired locations and testing it before final installation.
Gather the Materials
To successfully wire a push button start straight from the starter, you will need the following materials:
- A single pole double throw relay
- A momentary switch (normally open)
- A single pole single throw switch
- Soldering equipment
- Wire
- A screwdriver
- Wire cutters
- Other various tools
Gathering these materials beforehand is essential to ensure a smooth installation process for your push button start system. Having all the necessary components and tools on hand will save you time and effort during the installation.
In addition to the materials, it’s also helpful to have a clear understanding of your vehicle’s wiring diagram. This will guide you in identifying the ignition wire and starter wire, and help you make the proper connections.
Having the right materials and a good understanding of your vehicle’s wiring diagram will set you up for a successful push button start installation.
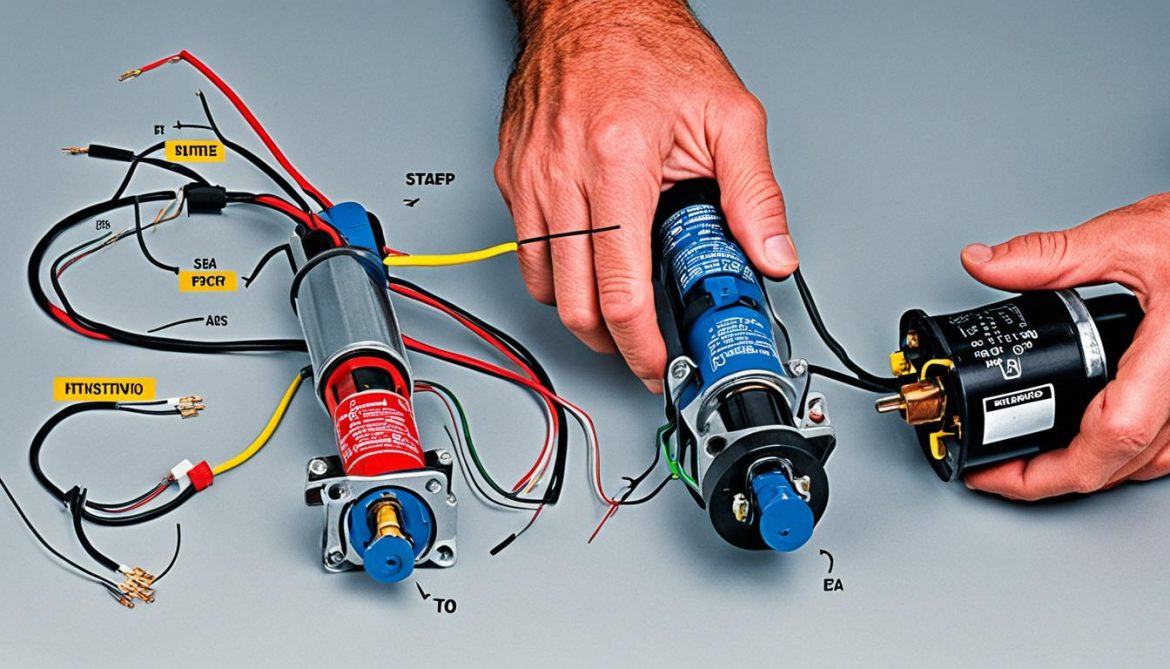
Access the Ignition Harness
Before you begin the installation process, it is necessary to access the ignition harness in your vehicle. Typically, the ignition harness is located near the keyhole. This is where you will find the wires that connect to the ignition system.
To successfully wire a push button start, you need to identify two key wires: the ignition wire and the starter wire. The ignition wire is responsible for supplying power to the vehicle’s ignition system, while the starter wire is connected to the starter motor, enabling the engine to start.
A wiring diagram specific to your vehicle is an invaluable resource in identifying these wires accurately. It provides a visual representation of the wire colors and their corresponding functions, making the process much easier and ensuring a successful installation.
Once you have gathered the necessary information from the wiring diagram, you can proceed to locate and access the ignition harness. Carefully trace the wires to the ignition switch and starter solenoid, as they are crucial components for the push button start system.
Identifying the Ignition and Starter Wires
After locating the ignition harness, you need to identify the ignition wire and the starter wire. Use the information from the wiring diagram to match the wire colors and functions.
- The ignition wire is usually connected to the ignition switch and is responsible for supplying electrical power to the vehicle’s ignition system. It is commonly colored red, but refer to the wiring diagram for confirmation.
- The starter wire connects to the starter solenoid and engages the starter motor when the ignition switch is turned. The wire color may vary depending on the vehicle make and model, so consult the wiring diagram to identify the correct wire.
Once you have located the ignition and starter wires, it is necessary to cut and strip them for the installation process. This allows you to connect the push button start system effectively.
Refer to the wiring diagram for the specific locations and colors of the ignition and starter wires in your vehicle. Take your time and ensure accurate identification before proceeding to the next steps.
Connect the Hardware
Now that you have accessed the ignition harness and identified the necessary wires, it’s time to connect the hardware for your push button start system. This step involves soldering the ignition and starter wire ends to the appropriate switches and relays. By making these connections, you will create a closed circuit using the ignition wire, which will be used to switch the relay and start the engine.
Ensure that you have all the necessary components before you begin the wiring process. Once everything is properly connected, your push button start system will function correctly, providing you with the convenience and style you desire.
| Materials needed | Tools needed |
|---|---|
|
|

It’s important to ensure that all components are properly wired and connected to guarantee the smooth operation of your push button start system. Take your time during this step, double-checking all connections to avoid any potential issues in the future.
Install the System
Now that you have assembled the necessary hardware, it’s time to proceed with the installation of the push button start system in your vehicle.
First, determine the ideal placement for the buttons and switches. Consider convenience and accessibility when choosing the locations. Common options include the dashboard, center console, or steering column.
Using appropriate tools, carefully drill holes in the chosen locations for mounting the buttons and switches. Ensure that the holes are the correct size to securely fasten the components.
Once the holes are drilled, insert the buttons and switches into their designated places. Make sure they fit snugly and are properly aligned.
After installing the buttons and switches, it is crucial to test the system before finalizing the installation. This ensures that all the components are functioning correctly.
To test the push button start system:
- Reconnect the vehicle’s battery.
- Turn the key to the “off” position.
- Press the push button start button while holding the brake pedal. The engine should start.
- Release the brake pedal and verify that the engine remains running.
- Repeat the test multiple times to ensure consistent and reliable operation.
If the system does not work as expected, double-check the wiring connections and troubleshoot any potential issues.
Once you are satisfied with the system’s performance, proceed with the final installation, securing the buttons and switches in place and neatly organizing the wiring.
Remember to follow the recommended guidelines provided by the manufacturer for further assistance.
With the push button start system installed and tested, you are now ready to enjoy the convenience and modern touch it brings to your vehicle.
Safety Considerations
When wiring a push button start straight from the starter, it’s important to prioritize safety. Taking necessary precautions and following proper safety guidelines will help ensure a successful and secure installation. Here are some safety considerations to keep in mind:
- Disconnect the Battery: Before starting the installation process, always disconnect the vehicle’s battery to prevent any electrical shock or damage. This is an essential step to ensure your safety throughout the installation.
- Wear Protective Gear: When handling tools and soldering equipment, it’s important to wear appropriate protective gear such as gloves and safety glasses. This will protect you from any potential hazards or accidents.
- Use Appropriate Tools and Materials: To ensure a safe installation, always use high-quality tools and materials that are specifically designed for automotive wiring. Using the right tools will minimize the risk of faulty connections and potential electrical hazards.
- Follow Wiring Guidelines: The push button start system should be wired according to the manufacturer’s guidelines and recommendations. Improper wiring can lead to short circuits, electrical fires, and other hazards. Make sure to carefully follow the provided instructions.
- Test the System: Before finalizing the installation, it’s crucial to test the push button start system thoroughly. This includes checking the functionality of the switches and relays, as well as ensuring that the system starts the engine consistently.
- Seek Professional Help if Needed: If you are unsure about any step of the installation process or encounter difficulties, it is always recommended to seek the assistance of a professional automotive electrician or technician. They have the expertise and experience to ensure a safe and reliable installation.
Push Button Start Safety Precautions
While a push button start system adds convenience to your vehicle, it’s important to practice safety precautions to mitigate potential hazards. Here are some additional safety tips:
- Always Engage the Parking Brake: Before starting the engine, make sure the vehicle is in park and the parking brake is engaged to prevent any unintended movement.
- Be Aware of Your Surroundings: When using the push button start, be mindful of your surroundings. Ensure there are no obstacles or hazards around the vehicle, and always keep an eye on pedestrians and other vehicles.
- Teach Others to Use the System: If you share your vehicle with others, it’s important to educate them on how to properly use the push button start system. Ensure they understand the necessary precautions to avoid any accidents or misuse.
| Hazards | Precautions |
|---|---|
| Electrical Shock | – Always disconnect the battery before starting the installation process. – Wear protective gear when handling tools and equipment. – Follow proper wiring guidelines. |
| Short Circuits | – Use appropriate tools and materials designed for automotive wiring. – Insulate and secure all electrical connections to prevent accidental short circuits. – Double-check the wiring connections before testing the system. |
| Fire Hazards | – Avoid using damaged or frayed wires. – Ensure the push button start system is not exposed to flammable materials. – Regularly inspect the system for any signs of overheating or abnormal behavior. |
By following these safety considerations and taking necessary precautions, you can enjoy the convenience of a push button start system while ensuring the safety of yourself and your vehicle.
Conclusion
In conclusion, adding a push button start system to your vehicle by wiring it straight from the starter can offer both convenience and style. By following the step-by-step instructions provided in this article, you can successfully install this feature and enjoy the benefits it brings to your driving experience.
Throughout the installation process, it’s crucial to prioritize safety. Taking necessary precautions, such as disconnecting the battery, will help prevent accidents or damage. Additionally, following proper wiring guidelines and using the right tools and materials will ensure a secure and efficient installation.
In summary, a push button start is a fantastic addition to any vehicle. It provides a modern and streamlined alternative to using traditional keys. By wiring it straight from the starter, you can enjoy the convenience and style this system offers. So, upgrade your driving experience and embrace the ease of starting your vehicle with a simple push of a button.
FAQ
What materials do I need to wire a push button start straight from the starter?
To wire a push button start straight from the starter, you will need a single pole double throw relay, a momentary switch (normally open), a single pole single throw switch, soldering equipment, wire, a screwdriver, wire cutters, and other various tools.
How do I access the ignition harness in my vehicle?
The ignition harness is usually located near the keyhole in your vehicle. You will need to identify the ignition wire and the starter wire using a wiring diagram specific to your vehicle. Once identified, the ignition and starter wires will need to be cut and stripped for the installation process.
What is involved in connecting the hardware for a push button start system?
Connecting the hardware for a push button start system involves soldering the ignition and starter wire ends to the appropriate switches and relays. The closed circuit of the ignition wire will be used to switch the relay and start the engine.
How do I install the push button start system in my vehicle?
Installing the push button start system involves placing the buttons and switches in desired locations, such as drilling holes in the dashboard for them. It is important to test the system before final installation to ensure everything is functioning properly.
What safety considerations should I keep in mind when wiring a push button start straight from the starter?
Prioritize safety by disconnecting the battery before starting the installation process to avoid accidents or damage. Follow proper wiring guidelines, and use appropriate tools and materials to enhance safety during the installation.